The latest simulator has some additional features beyond what is described on the main simulator page.
If you resize the window that contains the Karel J Robot world, the world itself will resize. It will keep all of the streets in view, but there may be too many avenues to show in your new window. The blocks are kept square and sized so that all of the blocks will fit in the height of your new window.
Note that screen drawing is now double buffered so that you should see no flicker with moving robots.
When the entire world isn't visible in your window, scrollbars will appear so that you can see the rest. Note that the world does not scroll automatically if the robot moves off the screen. Note also that the logical world is infinite to the North and East even though you show only a part of it. The robots are allowed to walk off the visible portion. The scroll bars, however, only show the visible portion.
The standard color used to draw the streets and avenues is a dark red. You can change this by sending the World a message.
World.setStreetColor(Color.blue);
will set the streets and avenues to blue. You must import java.awt.Color for this to work, of course.
You can also change the color of the beepers and the walls.
World.setBeeperColor(Color.magenta);
World.setNeutroniumColor(Color.green.darker());
will set the beepers to magenta and the walls (made of Neutronium) to a dark green.
You can now also set the background color.
See the Change History page or the Java Docs.
You can now give any robot a small color "badge" that it will wear. If you have several robots in your world you can give them different color badges to keep them separate visually. If you have imported java.awt.Color you can create an ur_Robot with a blue badge with
ur_Robot karel = new ur_Robot(1, 1, North, 0, Color.blue);
If you want to use this feature in your own robot classes you will need to define this new constructor as well:
class StairClimber extends ur_Robot
{
	public StairClimber(int street, int avenue, Direction direction, int beepers, Color badge)
	{	super(street, avenue, direction, beepers, badge);
	}
...

}
You can do this in addition to, or instead of, the usual
constructor. You may use any color you like, not just the standard
ones. This behavior is implemented in both of the built-in robot
classes: ur_Robot and Robot. You can extend it to your classes yourself
as above.
You can now step through the operation of your robot programs. There are two options for this: Primitive stepping, and User stepping.
You can make any robot pause just before executing any of the primitive instructions defined in Chapter 3 or any of the predicates defined in Chapter 5 with this method. The robot will pause until you type a return/enter into the console window.
To make it pause you must turn on primitive stepping for this robot by sending it the setPause(true) message. You can do this anytime, but if you want to step through the entire program, do it just after you create the robot. Then, just before executing any primitive instruction or predicate it will pause and a message will appear in the console window telling you what it is about to do. So if your robot is named karel, you can use
karel.setPause(true);
to turn stepping on. Then, if karel executes a turnLeft instruction, it will first display (in the system console)
RobotID 0 is about to turnLeft.
(assuming it is the first robot (ID 0) you create) and will wait for you to type enter/return to continue. You can also turn off stepping for the robot by sending it the setPause(false) message. It will then behave as usual. It will neither print the messages, nor wait to continue.
You might also want to have the simulator pause elsewhere in your robot program: for example at the beginning of the methods that you write yourself. This requires two steps. You turn pausing on for any given robot by sending that robot the setUserPause(true) message. You can turn it off similarly. This alone will have no effect, however. You must also send the robot userPause("do something") messages at the points at which you want it to actually pause. If you have setUserPause(true) earlier in the program, then the robot will have the string you include as a parameter printed in the console window and will wait for you to type a return/enter. Actually the string will be prepended with "RobotID x is about to " so with the example message (above) sent to karel the console will actually show
RobotID 0 is about to do something.
Use this information to make your strings informative.
The usual way to use this is to put userPause messages at the beginning of your methods. For example
public void turnRight()
{	userPause("turn right");
	turnLeft();
	turnLeft();
	turnLeft();
}
Here the message goes to the "this" robot of course, just as the turnLeft messages do.
Note that by itself userPause(...) does nothing unless you turn on user pausing for that robot. This way you can leave userPause(...) messages in your programs and then have them pause or not at these points by turning user pausing on or off with setUserPause(true) and setUserPause(false).
Note finally, that you can turn on both Primitive stepping and User
stepping. These are independent of each other.
New cursors have been added to the WorldBuilder and MiniBuilder. These reflect the current tool and the state of the control and shift keys. These won't appear in all systems, as not all support custom cursors.
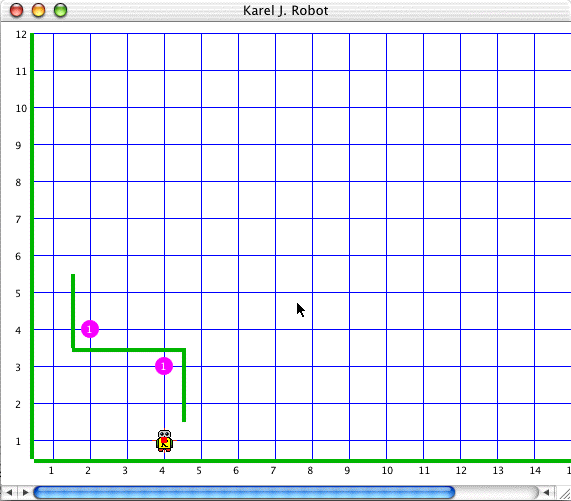
Sometimes you would like to manually step a robot through a task. You might want to do this to try out an idea, for example. Here is a class that will create a remote controller and a robot that it will control. You can create several of these and each robot will have its own controller. You can mix these with robots guided under program control as well. This is graphical interface coding.
Here is a test program that creates two such robots in a world. It also shows some things about how to parse user input when you run from a command line. This is command line coding.
Here is what it looks like when you run.
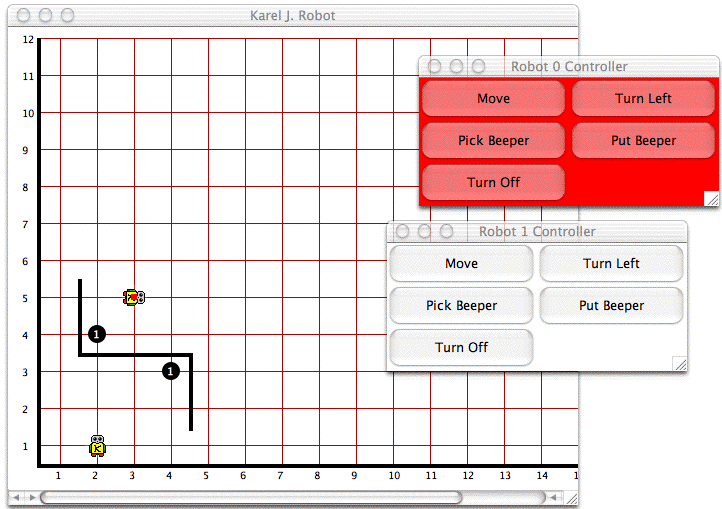
Notice that a robot with a red badge has a controller with a red background, and one with no badge has a white background. This controller creates an ur_Robot. There is no reason why you cannot create a remote controller for your own classes that has a button for each method. To do this required no changes to the underlying system.
And here is a zip file that contains both of the above files as well as the code shown below: samplecode.zip
The idea of strategy and decorator that is introduced in Chapter 4 is extremely powerful. So powerful, in fact, that you can create an object that behaves just like a method. This object can be created dynamically as the program runs by decorating a strategy over and over to build up the statements you want in the "method". You can pass this object around as a parameter to methods and at some time in the progam you can get any robot to execute your method. All of the primitives of the robot programming language can be done this way, though if you extend it (adding fields to your robots, for example) you will have some difficulty extending this framework.
This interface defines a lot of other interfaces internally that it exports. A Strategy.Action is what we have called a strategy in Chapter 4 and a Strategy.Predicate includes both a test and a body to be used in an if or while statement. The test and the body are included together because in some programs you might want to create these two need to communicate with each other, though that isn't needed if we stick strictly to the robot programming model.
And here is a sample main to show you how it might be used.
This code is quite sophisticated. The NULL exported is a strategy (Action) that doesn't do anything. It is usually the innermost strategy and represents an empty "first" statement in any fragment. The other Action classes define decorators for this and they decorate by firing the doIt method of the decorated object before their own statement. We therefore build up the method fragment from the top down. You can override to change this behavior, of course. The predicates are also actions, but add a Robot test as well. These can only be executed by Robot objects, not ur_Robots. An IfBlock represents an if statement and takes a predicate that defines both its test and its body. This is similar for a WhileBlock. An IfElseBlock on the other hand, requires an additional Action for the body of the else part.
The doIt methods pass a Hashtable as well as a robot, since a Hashtable is a very effective and general way to pass additional information that might be needed in a particular case.
Finally, the Strategy interface exports a Factory class that can be used to easily create any of these objects and automatically add the new part as a decorator of an existing fragment. The factory requires the newInstance methods of the other classes and uses polymorphism to create an object of just the required type. The design pattern here is technically called "Factory Method." The StrategyTestMain class shows how it all fits together and also how you might build additional Actions and Predicates.
Note that in Lisp and Scheme, this ability to create a function on the fly in a program, pass it as data, and later execute it, is a fundamental technique and gives these languages much of their power. It is interesting that we can so something nearly as sophisticated in as simple a tool as KJR using something as simple as a decorator.
The code is in the samplecode.zip file of the previous section.
If you build a Robot class that implements the Strategy.DelayedExecutor interface, then implement the execute method like this:
	public void execute(Strategy.Action anAction, Hashtable values)
	{	anAction.doIt(this, values);
	}
On October 3, 2003, I started a Change History for the simulator.Minor changes will be shown there.
This has been tested on a number of systems. It is known to work on the Macintosh with OS 9.2 and recent versions of Codewarrior. It runs under Windows 2000 using the command line and, I expect, most other systems. It has not been tested on Linux. It works on the Macintosh OS X provided that you do NOT have JDK 1.4.1 where it leaves artifacts on the screen as it draws. This is due to some hardware acceleration that seems not to be right in that JDK. It works with JDK 1.3.1, however.
Built on a Macintosh running OS X using Eclipse.
Last Updated:October 31, 2003