CS835 - Data and Document Representation
& Processing
|
|
Lecture 5 – Authoring –
Part 2 |
XML Applications: SVG, SMIL, & MathML
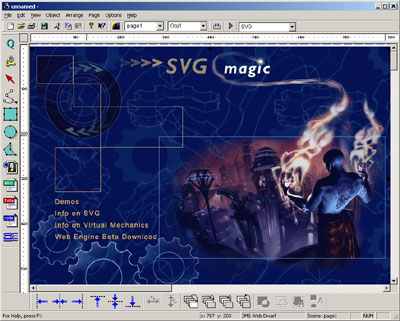
SVG
Ref: Tutorial 2: http://www.w3schools.com/svg/default.asp
What is SVG?
- SVG stands for Scalable Vector Graphics
- SVG is used to define vector-based graphics for the Web
- SVG defines the graphics in XML format
- SVG graphics do NOT lose any quality if they are zoomed or resized
- Every element and every attribute in SVG files can be animated
- SVG is a World Wide Web Consortium (W3C) recommendation
- SVG integrates with other W3C standards such as the DOM and XSL
SVG History & Advantages
· SVG 1.1 became a W3C Recommendation in January 2003.
· Sun Microsystems, Adobe, Apple, IBM, and Kodak are some of the well-known organizations that have been involved in defining SVG.
· Advantages of using SVG over other image formats (like JPEG and GIF):
- SVG files can be read and modified by a large range of tools (e.g. notepad)
- SVG files are smaller and more compressible than JPEG or GIF images
- SVG images are scalable
- SVG images can be printed with high quality at any resolution
- SVG images are zoomable. Any part of the image can be zoomed without degradation
- Text in SVG is selectable and searchable (excellent for making maps)
- SVG works with Java technology
- SVG is an open standard
- SVG files are pure XML
· Main competitor to SVG is Flash.
· Have similar features.
· Advantage of SVG over Flash is the compliance with other standards (e.g. XSL and the DOM).
o Flash relies on proprietary technology that is not open source.
· Disadvantage of SVG at the moment is that no browser fully supports SVG.
o Mozilla and Microsoft plan to fully support SVG.
o Adobe GoLive 5 already supports SVG and the number of SVG editors are growing.
· Look at the official W3C list of implementations of SVG
Viewing SVG Files
You cannot view SVG files if you do not have an SVG viewer installed.
Download an SVG Viewer for FREE from Adobe.
SVG Document Structure
There are three ways of defining SVG in a Web document:
- as a standalone SVG page
- as an embedded element
- in an XHTML document with a namespace declaration
A Standalone SVG Page
The following example defines a standalone SVG file. The file must be saved with an .svg extension:
<?xml version="1.0" standalone="no"?><!DOCTYPE svg PUBLIC "-//W3C//DTD SVG 1.1//EN" "http://www.w3.org/Graphics/SVG/1.1/DTD/svg11.dtd"><svg width="300" height="300" x="0" y="0">............</svg> |
o The first line in the example above contains the XML declaration.
o Since SVG is an XML application it should always include the XML declaration.
o The second and third line defines the Document Type Declaration (DTD) to use.
o The DTD describes the language and syntax allowed in SVG.
o The fourth line contains the <svg> tag. This tag "tells" the browser that this is an SVG document.
o The canvas of the SVG document is defined by the width and height attributes.
o If you do not define the width and height attributes the svg canvas will fill the browser dimensions.
o The x and y attributes specifies where the canvas will be placed in the browser window.
o The fifth, sixth, and seventh line: Where to place all the SVG elements.
o The last line, </svg>, closes the document.
o Since SVG is XML-based most of the search engines will not pick up a standalone SVG page.
o To solve this problem we can add SVG as an embedded element in an XHTML page.
SVG as an Embedded Element
The following example shows how to embed SVG within an XHTML document:
<!DOCTYPE html PUBLIC "-//W3C//DTD XHTML 1.0 Transitional//EN""http://www.w3.org/TR/xhtml1/DTD/xhtml1-transitional.dtd"><html><body><object data="test.svg" width="500"height="500" type="image/svg+xml"><embed src="test.svg" width="500"height="500" type="image/svg+xml" /></object></body></html> |
o Straightforward XHTML document.
o Notice the use of the <object> and <embed> tags
o According to the XHTML standard we should only use the <object> tag, but since Netscape does not support this tag we find it best to use both the <object> and <embed> tags.
o By using this method the document will be picked up by search engines.
o Also makes it easier to integrate other objects (e.g. sound, music, Flash) on the same web page.
SVG Shapes
SVG has some predefined shape elements that can be used and manipulated by developers:
- Rectangle <rect>
- Circle <circle>
- Ellipse <ellipse>
- Line <line>
- Polyline <polyline>
- Polygon <polygon>
- Path <path>
The following chapters will explain each element, starting with the rect element.
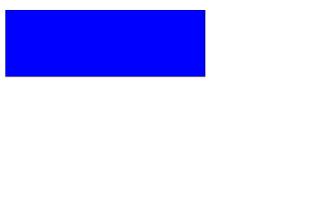
The <rect> Tag
o The <rect> tag is used to create a rectangle and variations of a rectangle shape.
"rect1.svg"
<?xml version="1.0" standalone="no"?><!DOCTYPE svg PUBLIC "-//W3C//DTD SVG 20000303 Stylable//EN""http://www.w3.org/Graphics/SVG/1.1/DTD/svg11.dtd"> <svg width="300" height="300"> <rect width="300" height="100"style="fill:rgb(0,0,255);stroke-width:1;stroke:rgb(0,0,0)"/> </svg> |
Code explanation:
- The width and height attributes of the rect element define the height and the width of the rectangle
- The style attribute is used to define CSS properties
- The CSS fill property defines the fill color of the rectangle (either an rgb value, a color name, or a hexadecimal value)
- The CSS stroke-width property defines the width of the border of the rectangle
- The CSS stroke property defines the color of the border of the rectangle
"rect1.htm"
<!DOCTYPE html PUBLIC "-//W3C//DTD XHTML 1.0 Transitional//EN""http://www.w3.org/TR/xhtml1/DTD/xhtml1-transitional.dtd"> <html><body> <object data="rect1.svg" width="100%"height="100%" type="image/svg+xml"><embed src="rect1.svg" width="100%"height="100%" type="image/svg+xml" /></object> </body></html> |
Open the "rect1.htm" file in your browser to view your first SVG graphic!!!
Additional attributes:
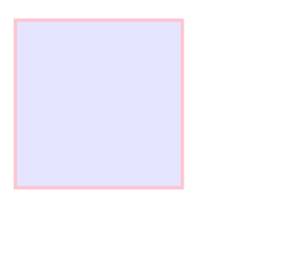
<?xml version="1.0" standalone="no"?><!DOCTYPE svg PUBLIC "-//W3C//DTD SVG 20000303 Stylable//EN""http://www.w3.org/Graphics/SVG/1.1/DTD/svg11.dtd"> <svg width="300" height="300"> <rect x="20" y="20" width="250" height="250"style="fill:blue;stroke:pink;stroke-width:5;fill-opacity:0.1;stroke-opacity:0.9"/> </svg> |
Code explanation:
- The x attribute defines the left position of the rectangle (e.g. x="0" places the rectangle 0 pixels from the left of the browser window)
- The y attribute defines the top position of the rectangle (e.g. y="0" places the rectangle 0 pixels from the top of the browser window)
- The CSS fill-opacity property defines the opacity of the fill color (legal range: 0 to 1)
- The CSS stroke-opacity property defines the opacity of the stroke color (legal range: 0 to 1)
Define the opacity for the whole element:
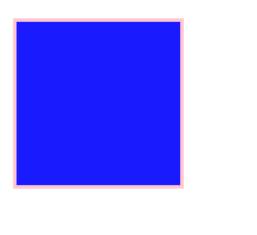
<?xml version="1.0" standalone="no"?><!DOCTYPE svg PUBLIC "-//W3C//DTD SVG 20000303 Stylable//EN""http://www.w3.org/Graphics/SVG/1.1/DTD/svg11.dtd"> <svg width="300" height="300"> <rect x="20" y="20" width="250" height="250"style="fill:blue;stroke:pink;stroke-width:5;opacity:0.9"/> </svg> |
Code explanation:
- The CSS opacity property defines the opacity value for the whole element (legal range: 0 to 1)
Last example, create a rectangle with rounded corners:

<?xml version="1.0" standalone="no"?><!DOCTYPE svg PUBLIC "-//W3C//DTD SVG 20000303 Stylable//EN""http://www.w3.org/Graphics/SVG/1.1/DTD/svg11.dtd"> <svg width="300" height="300"> <rect x="20" y="20" rx="20" ry="20" width="250"height="100" style="fill:red;stroke:black;stroke-width:5;opacity:0.5"/> </svg> |
Code explanation:
- The rx and the ry attributes rounds the corners of the rectangle
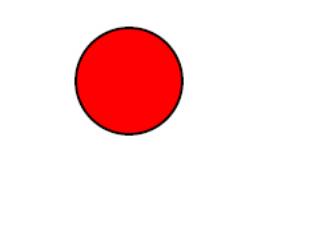
The <circle> Tag
The <circle> tag is used to create a
circle.
"circle1.svg"
<?xml version="1.0" standalone="no"?><!DOCTYPE svg PUBLIC "-//W3C//DTD SVG 20000303 Stylable//EN""http://www.w3.org/Graphics/SVG/1.1/DTD/svg11.dtd"> <svg width="300" height="300"> <circle cx="100" cy="50" r="40" stroke="black"stroke-width="2" fill="red"/> </svg> |
Code explanation:
- The cx and cy
attributes define the x and y coordinates of the center of the circle. If
cx and cy are omitted, the circle's center is set to (0, 0)
- The r attribute defines
the radius of the circle
"circle.htm"
<!DOCTYPE html PUBLIC "-//W3C//DTD XHTML 1.0 Transitional//EN""http://www.w3.org/TR/xhtml1/DTD/xhtml1-transitional.dtd"> <html><body> <object data="circle1.svg" width="100%"height="100%" type="image/svg+xml"><embed src="circle1.svg" width="100%"height="100%" type="image/svg+xml" /></object> </body></html> |
Open the "circle1.htm" file in
your browser!
The <ellipse> tag is used to create an ellipse.
The <ellipse> Tag
The <ellipse> tag is used to create an ellipse.
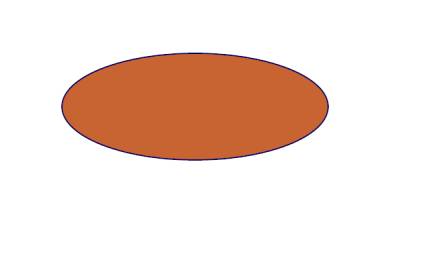
"ellipse1.svg"
<?xml version="1.0" standalone="no"?> <!DOCTYPE svg PUBLIC "-//W3C//DTD SVG 20000303 Stylable//EN" "http://www.w3.org/Graphics/SVG/1.1/DTD/svg11.dtd"> <svg width="500" height="500"> <ellipse cx="300" cy="150" rx="200" ry="80" style="fill:rgb(200,100,50); stroke:rgb(0,0,100);stroke-width:2"/> </svg> |
Code explanation:
- The cx attribute defines the x coordinate of the center of the ellipse
- The cy attribute defines the y coordinate of the center of the ellipse
- The rx attribute defines the horizontal radius
- The ry attribute defines the vertical radius
"ellipse1.htm"
<!DOCTYPE html PUBLIC "-//W3C//DTD XHTML 1.0 Transitional//EN" "http://www.w3.org/TR/xhtml1/DTD/xhtml1-transitional.dtd"> <html> <body> <object data="ellipse1.svg" width="100%" height="100%" type="image/svg+xml"> <embed src="ellipse1.svg" width="100%" height="100%" type="image/svg+xml" /> </object> </body> </html> |
Open the "ellipse1.htm" file in your browser!
View example
The following example creates three ellipses on top of each other:
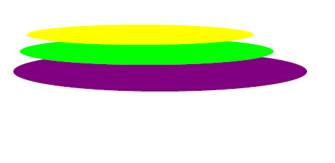
<?xml version="1.0" standalone="no"?> <!DOCTYPE svg PUBLIC "-//W3C//DTD SVG 20000303 Stylable//EN" "http://www.w3.org/Graphics/SVG/1.1/DTD/svg11.dtd"> <svg width="100%" height="100%"> <ellipse cx="240" cy="100" rx="220" ry="30" style="fill:purple"/> <ellipse cx="220" cy="70" rx="190" ry="20" style="fill:lime"/> <ellipse cx="210" cy="45" rx="170" ry="15" style="fill:yellow"/> </svg> |
The <line> Tag
The <line> tag is used to create a line.
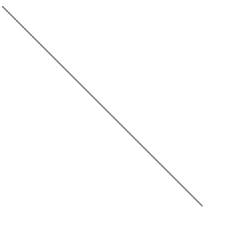
"line1.svg"
<?xml version="1.0" standalone="no"?> <!DOCTYPE svg PUBLIC "-//W3C//DTD SVG 20000303 Stylable//EN" "http://www.w3.org/Graphics/SVG/1.1/DTD/svg11.dtd"> <svg width="300" height="300"> <line x1="0" y1="0" x2="300" y2="300" style="stroke:rgb(99,99,99);stroke-width:2"/> </svg> |
Code explanation:
- The x1 attribute defines the start of the line on the x-axis
- The y1 attribute defines the start of the line on the y-axis
- The x2 attribute defines the end of the line on the x-axis
- The y2 attribute defines the end of the line on the y-axis
"line1.htm"
<!DOCTYPE html PUBLIC "-//W3C//DTD XHTML 1.0 Transitional//EN" "http://www.w3.org/TR/xhtml1/DTD/xhtml1-transitional.dtd"> <html> <body> <object data="line1.svg" width="100%" height="100%" type="image/svg+xml"> <embed src="line1.svg" width="100%" height="100%" type="image/svg+xml" /> </object> </body> </html> |
Open the "line1.htm" file in your browser!
The <polygon> Tag
The <polygon> tag is used to create a graphic that contains at least three sides.
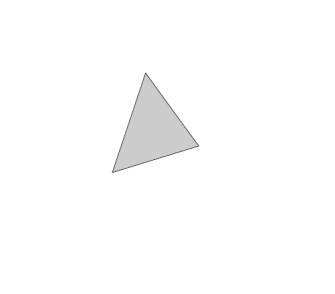
"polygon1.svg"
<?xml version="1.0" standalone="no"?> <!DOCTYPE svg PUBLIC "-//W3C//DTD SVG 20000303 Stylable//EN" "http://www.w3.org/Graphics/SVG/1.1/DTD/svg11.dtd"> <svg width="100%" height="100%"> <polygon points="220,100 300,210 170,250" style="fill:#cccccc; stroke:#000000;stroke-width:1"/> </svg> |
Code explanation:
- The points attribute defines the x and y coordinates for each corner of the polygon
"polygon1.htm"
<!DOCTYPE html PUBLIC "-//W3C//DTD XHTML 1.0 Transitional//EN" "http://www.w3.org/TR/xhtml1/DTD/xhtml1-transitional.dtd"> <html> <body> <object data="polygon1.svg" width="100%" height="100%" type="image/svg+xml"> <embed src="polygon1.svg" width="100%" height="100%" type="image/svg+xml" /> </object> </body> </html> |
Open the "polygon1.htm" file in your browser!
View
example
The <polyline> Tag
The <polyline> tag is used to create any shape that consists of only straight lines.
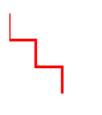
"polyline1.svg"
<?xml version="1.0" standalone="no"?> <!DOCTYPE svg PUBLIC "-//W3C//DTD SVG 20000303 Stylable//EN" "http://www.w3.org/Graphics/SVG/1.1/DTD/svg11.dtd"> <svg width="100%" height="100%"> <polyline points="0,0 0,20 20,20 20,40 40,40 40,60" style="fill:white;stroke:red;stroke-width:2"/> </svg> |
"polyline1.htm"
<!DOCTYPE html PUBLIC "-//W3C//DTD XHTML 1.0 Transitional//EN" "http://www.w3.org/TR/xhtml1/DTD/xhtml1-transitional.dtd"> <html> <body> <object data="polyline1.svg" width="100%" height="100%" type="image/svg+xml"> <embed src="polyline1.svg" width="100%" height="100%" type="image/svg+xml" /> </object> </body> </html> |
Open the "polyline1.htm" file in your browser!
The <path> Tag
The <path> tag is used to define a path.
The following commands are available for path data:
- M = moveto
- L = lineto
- H = horizontal lineto
- V = vertical lineto
- C = curveto
- S = smooth curveto
- Q = quadratic Belzier curve
- T = smooth quadratic Belzier curveto
- A = elliptical Arc
- Z = closepath
Note: All of the commands above can also be expressed with lower letters. Capital letters means absolutely positioned, lower cases means relatively positioned.
"path1.svg"
|
<?xml version="1.0"
standalone="no"?> <!DOCTYPE
svg PUBLIC "-//W3C//DTD SVG 20000303 Stylable//EN" "http://www.w3.org/Graphics/SVG/1.1/DTD/svg11.dtd"> <svg
width="100%" height="100%"> <path
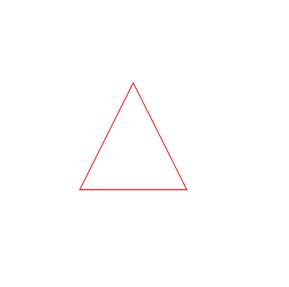
d="M250 150 L150 350 L350 350 Z" style="fill:white;stroke:red;stroke-width:2"/> </svg> |
· The example above defines a path that starts at position 250 150 with a line to position 150 350
· Draws a line to 350 350 and finally closing the path back to 250 150.
"path1.htm"
<!DOCTYPE html PUBLIC "-//W3C//DTD XHTML 1.0 Transitional//EN" "http://www.w3.org/TR/xhtml1/DTD/xhtml1-transitional.dtd"> <html> <body> <object data="path1.svg" width="100%" height="100%" type="image/svg+xml"> <embed src="path1.svg" width="100%" height="100%" type="image/svg+xml" /> </object> </body> </html> |
Open the "path1.htm" file in your browser!
The following example creates a spiral:
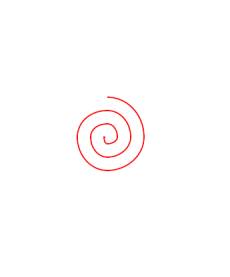
<?xml version="1.0" standalone="no"?> <!DOCTYPE svg PUBLIC "-//W3C//DTD SVG 20000303 Stylable//EN" "http://www.w3.org/Graphics/SVG/1.1/DTD/svg11.dtd"> <svg width="100%" height="100%"> <path d="M153 334 C153 334 151 334 151 334 C151 339 153 344 156 344 C164 344 171 339 171 334 C171 322 164 314 156 314 C142 314 131 322 131 334 C131 350 142 364 156 364 C175 364 191 350 191 334 C191 311 175 294 156 294 C131 294 111 311 111 334 C111 361 131 384 156 384 C186 384 211 361 211 334 C211 300 186 274 156 274" style="fill:white;stroke:red;stroke-width:2"/> </svg> |
SVG Filters
SVG Filters is used to add special effects to shapes and text.
The available filters in SVG are:
- feBlend
- feColorMatrix
- feComponentTransfer
- feComposite
- feConvolveMatrix
- feDiffuseLighting
- feDisplacementMap
- feFlood
- feGaussianBlur
- feImage
- feMerge
- feMorphology
- feOffset
- feSpecularLighting
- feTile
- feTurbulence
- feDistantLight
- fePointLight
- feSpotLight
An SVG Filter must be defined within a <defs> tag.
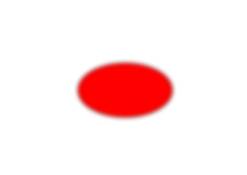
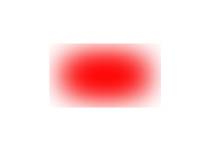
Gaussian Blur
· The <filter> tag is used to define an SVG filter.
· The <filter> tag has a required id attribute which identifies which filter will be applied to the graphic.
· The <filter> tag must be nested within a <defs> tag.
· The <defs> tag is short for definitions and it allows definition of special elements such as filter.
"filter1.svg"
<?xml version="1.0" standalone="no"?> <!DOCTYPE svg PUBLIC "-//W3C//DTD SVG 20000303 Stylable//EN" "http://www.w3.org/Graphics/SVG/1.1/DTD/svg11.dtd"> <svg width="100%" height="100%"> <defs> <filter id="Gaussian_Blur"> <feGaussianBlur in="SourceGraphic" stdDeviation="3" /> </filter> </defs> <ellipse cx="200" cy="150" rx="70" ry="40" style="fill:#ff0000;stroke:#000000; stroke-width:2;filter:url(#Gaussian_Blur)"/> </svg> |
Code explanation:
- The id attribute of the <filter> tag defines a unique name for the filter (the same filter can be used by many elements in the document)
- The filter:url(#Gaussian_Blur) property is used to link an element to a filter. The # character must be used when linking to the filters id
- The filter effect is defined with the <feGaussianBlur> tag. The fe prefix is used for all filters
- The stdDeviation attribute of the <feGaussianBlur> tag defines the amount of the blur
- The in="SourceGraphic" part defines that the effect is created from the whole image
"filter1.htm"
<!DOCTYPE html PUBLIC "-//W3C//DTD XHTML 1.0 Transitional//EN" "http://www.w3.org/TR/xhtml1/DTD/xhtml1-transitional.dtd"> <html> <body> <object data="filter1.svg" width="100%" height="100%" type="image/svg+xml"> <embed src="filter1.svg" width="100%" height="100%" type="image/svg+xml" /> </object> </body> </html> |
Open the "filter1.htm" file in your browser!
Another example with a different stdDeviation:
<?xml version="1.0" standalone="no"?> <!DOCTYPE svg PUBLIC "-//W3C//DTD SVG 20000303 Stylable//EN" "http://www.w3.org/Graphics/SVG/1.1/DTD/svg11.dtd"> <svg width="100%" height="100%"> <defs> <filter id="Gaussian_Blur"> <feGaussianBlur in="SourceGraphic" stdDeviation="20"/> </filter> </defs> <ellipse cx="200" cy="150" rx="70" ry="40" style="fill:#ff0000;stroke:#000000; stroke-width:2;filter:url(#Gaussian_Blur)"/> </svg> |
SVG Gradients
A gradient is a smooth transition from one color to another. In addition, several color transitions can be applied to the same element.
There are two main types of gradients in SVG:
- Linear Gradients
- Radial Gradients
Linear Gradients
The <linearGradient> tag is used to define an SVG linear gradient.
The <linearGradient> tag must be nested within a <defs> tag. The <defs> tag is short for definitions and it allows definition of special elements such as gradients.
Linear gradients can be defined as horizontal, vertical or angular gradients:
- Horizontal gradients are created when y1 and y2 are equal and x1 and x2 differ
- Vertical gradients are created when x1 and x2 are equal and y1 and y2 differ
- Angular gradients are created when x1 and x2 differ and y1 and y2 differ
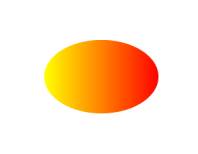
"linear1.svg"
<?xml version="1.0" standalone="no"?> <!DOCTYPE svg PUBLIC "-//W3C//DTD SVG 20000303 Stylable//EN" "http://www.w3.org/Graphics/SVG/1.1/DTD/svg11.dtd"> <svg width="100%" height="100%"> <defs> <linearGradient id="orange_red" x1="0%" y1="0%" x2="100%" y2="0%"> <stop offset="0%" style="stop-color:rgb(255,255,0); stop-opacity:1"/> <stop offset="100%" style="stop-color:rgb(255,0,0); stop-opacity:1"/> </linearGradient> </defs> <ellipse cx="200" cy="190" rx="85" ry="55" style="fill:url(#orange_red)"/> </svg> |
Code explanation:
- The id attribute of the <linearGradient> tag defines a unique name for the gradient
- The fill:url(#orange_red) property links the ellipse element to the gradient
- The x1, x2, y1,y2 attributes of the <linearGradient> tag define the starting and ending position of the gradient
- The color range for a gradient can be composed of two or more colors. Each color is specified with a <stop> tag. The offset attribute is used to define where the gradient color begin and end
"linear1.htm"
<!DOCTYPE html PUBLIC "-//W3C//DTD XHTML 1.0 Transitional//EN" "http://www.w3.org/TR/xhtml1/DTD/xhtml1-transitional.dtd"> <html> <body> <object data="linear1.svg" width="100%" height="100%" type="image/svg+xml"> <embed src="linear1.svg" width="100%" height="100%" type="image/svg+xml" /> </object> </body> </html> |
Open the "linear1.htm" file in your browser!
View example (Horizontal gradient)
Radial Gradients
· The <radialGradient> tag is used to define an SVG radial gradient.
· The <radialGradient> tag must be nested within a <defs> tag.
· The <defs> tag is short for definitions and it allows definition of special elements such as gradients.
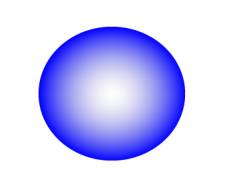
"radial1.svg"
<?xml version="1.0" standalone="no"?> <!DOCTYPE svg PUBLIC "-//W3C//DTD SVG 20000303 Stylable//EN" "http://www.w3.org/Graphics/SVG/1.1/DTD/svg11.dtd"> <svg width="100%" height="100%"> <defs> <radialGradient id="grey_blue" cx="50%" cy="50%" r="50%" fx="50%" fy="50%"> <stop offset="0%" style="stop-color:rgb(200,200,200); stop-opacity:0"/> <stop offset="100%" style="stop-color:rgb(0,0,255); stop-opacity:1"/> </radialGradient> </defs> <ellipse cx="230" cy="200" rx="110" ry="100" style="fill:url(#grey_blue)"/> </svg> |
Code explanation:
- The id attribute of the <radialGradient> tag defines a unique name for the gradient
- The fill:url(#grey_blue) property links the ellipse element to the gradient
- The cx, cy and r attributes define the outermost circle and the fx and fy define the innermost circle
- The color range for a gradient can be composed of two or more colors. Each color is specified with a <stop> tag. The offset attribute is used to define where the gradient color begin and end
Next, copy the following code into Notepad and save the file as "radial1.htm". Place the file in your Web directory:
<!DOCTYPE html PUBLIC "-//W3C//DTD XHTML 1.0 Transitional//EN" "http://www.w3.org/TR/xhtml1/DTD/xhtml1-transitional.dtd"> <html> <body> <object data="radial1.svg" width="100%" height="100%" type="image/svg+xml"> <embed src="radial1.svg" width="100%" height="100%" type="image/svg+xml" /> </object> </body> </html> |
Open the "radial1.htm" file in your browser!
SVG Examples
http://www.w3schools.com/svg/svg_examples.asp
SVG Implementations
http://www.w3.org/Graphics/SVG/SVG-Implementations
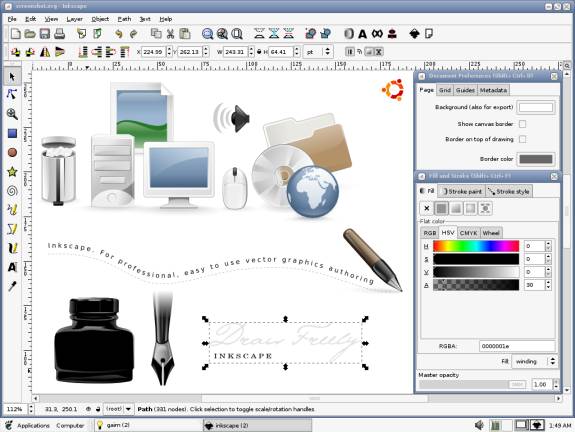
WYSIWYG SVG Editors
·
Inkscape http://www.inkscape.org/
Open
Source editor with plugins
|
|
SMIL - Synchronized Multimedia Integration Language
Reference: http://www.w3schools.com/smil/default.asp
What Is SMIL?
- SMIL stands for Synchronized Multimedia Integration Language
- SMIL is pronounced "smile"
- SMIL is a language for describing audiovisual presentations
- SMIL is easy to learn and understand
- SMIL is an HTML-like language
- SMIL is written in XML
- SMIL presentations can be written using a text-editor
- SMIL is a W3C standard
A Simplified SMIL Example
<smil> <body> <seq repeatCount="indefinite"> <img src="image1.jpg" dur="3s" /> <img src="image2.jpg" dur="3s" /> </seq></body> </smil> |
· The <smil></smil> tags defines the SMIL document.
· A <body> element defines the body of the presentation.
· A <seq> element defines a sequence to display.
· The repeatCount attribute defines an indefinite loop.
· Each <img> element has a src attribute to define the image source and a dur attribute to define the duration of the display.
What Can SMIL Do?
- SMIL can be used to create Internet or Intranet presentations
- SMIL can be used to create slide-show presentations
- SMIL has been described as the Internet answer to PowerPoint
- SMIL presentations can display multiple file types (text, video, audio...)
- SMIL presentations can display multiple files at the same time
- SMIL presentations can display files from multiple web servers
- SMIL presentations can contain links to other SMIL presentations
- SMIL presentations can contain control buttons (stop, start, next, ...)
- SMIL has functions for defining sequences and duration of elements
- SMIL has functions for defining position and visibility of elements
SMIL At W3C
W3C has been developing SMIL since 1997, as a language for choreographing multimedia presentations where audio, video, text and graphics are combined in real-time.
SMIL was presented as a working draft in November 1997.
SMIL 1.0 became a W3C Recommendation in. June 1998.
SMIL 2.0 became a W3C Recommendation in August 2001.
SMIL Files
· A SMIL file contains all the information necessary to describe a multimedia presentation.
· SMIL files are stored with the file extension *.smil
· A SMIL file contains the following:
- The layout of the presentation
- The timeline of the presentation
- The source of the multimedia elements
SMIL Markup
· Since SMIL is based on XML, the tags are case sensitive.
· All SMIL tags requires lowercase letters.
· A SMIL document must start with a <smil> tag and end with a </smil> closing tag. It may contain a <head> element and must contain a <body> element.
· The <head> element is used to store information about the presentation layout and other meta information.
· The <body> element contains the media elements.
<smil> <body> <seq repeatCount="indefinite"> <img src="image1.jpg" dur="3s" /> <img src="image2.jpg" dur="3s" /> </seq></body> </smil> |
How to Play a SMIL File?
To play a SMIL presentation, you will need a SMIL player. Different SMIL players can be found on the Internet:
- RealOne Platform by RealNetworks has full support for SMIL 2.0
- GRiNS for SMIL-2.0 by Oratrix provides a SMIL 2.0 player
- SMIL Player by InterObject supports the SMIL 2.0 Basic Profile
Playing SMIL Presentations in Internet Explorer
· With Internet Explorer 5.5 or later, SMIL elements can be inserted into HTML files.
· This way any SMIL presentation can run over the Internet as standard HTML files.
Running SMIL Presentations in IE
· With Internet Explorer 5.5 or later, SMIL elements can be inserted into HTML files.
· This way any SMIL presentation can run over the Internet as standard HTML files.
Adding References
To use SMIL elements in HTML you must define a "time" namespace for Internet Explorer to recognize the elements. This is done by:
- Adding a namespace definition to the <html> tag.
- Adding an <?import> element to import the "time" namespace.
· To add SMIL attributes to standard HTML elements you must define a "time" class for Internet Explorer to recognize the attributes.
· This is done by:
- Adding a <style> element to define the class "time".
<html xmlns:time="urn:schemas-microsoft-com:time"> <head> <?import namespace="time" implementation="#default#time2"> <style>.time {behavior: url(#default#time2)}</style></head> |
Adding SMIL Elements
· To run a SMIL presentation in HTML, just add a prefix and a class attribute to the SMIL elements:
<time:seq repeatCount="indefinite"> <img class="time" src="image1.jpg" dur="3s" /> <img class="time" src="image2.jpg" dur="3s" /></time:seq> |
· Have added class="time" to the <img> elements, and a "time" prefix to the SMIL elements
· To run a SMIL presentation in HTML, just add a prefix and a class attribute to the SMIL elements:
Internet Explorer Example
<html xmlns:time="urn:schemas-microsoft-com:time"> <head> <?import namespace="time" implementation="#default#time2"> <style>.time {behavior: url(#default#time2)}</style></head> <body> <time:seq repeatCount="indefinite"> <img class="time" src="image1.jpg" dur="3s" /> <img class="time" src="image2.jpg" dur="3s" /> </time:seq></body> </html> |
HTML+TIME
· In June 1998 SMIL 1.0 became a W3C Recommendation.
· In September 1998 Microsoft, Macromedia, Compaq/Digital and Digital Renaissance submitted HTML+TIME to W3C as a proposal for adding SMIL 1.0 timing and synchronization support to HTML.
· The HTML+TIME document describes very much the support for SMIL that can be found in Internet Explorer 5.
XHTML+SMIL
· In August 2001 SMIL 2.0 became a W3C Recommendation, and XHTML+SMIL became a separate Working Draft, based on the ideas in the HTML+TIME note.
· The XHTML+SMIL document describes very much the support for SMIL that can be found in Internet Explorer 6.0.
· More about the SMIL activities at W3C at our W3C Tutorial.
What Is Happening Here?
· SMIL is currently in a very interesting development process.
· SMIL 1.0 defined a simple way to create visual media presentations and how to play them.
· HTML+TIME added SMIL 1.0 abilities to nearly all HTML elements.
· SMIL 2.0 added interactivity and transitions to SMIL 1.0.
· XHTML+SMIL adds SMIL 2.0 abilities to nearly all XHTML elements.
· XHTML+SMIL has a great potential for taking the web to the next level, and let browsers treat audio and video like "old" HTML treated text and images. Many of these features are already implemented in Internet Explorer.
Why XHTML+SMIL?
· Is it not obvious?
· To run a SMIL presentation you need a SMIL player.
· SMIL defines a set of multimedia elements.
o Each of these elements can be given layout, timing, and transition attributes and rules.
Timelines and Timing
· Most SMIL element have timing attributes to define the timeline of the presentation.
· Timing attributes defines the start time and the duration of an element.
· The following table lists the possible time formats:
|
Format |
Examples |
|
hh:mm:ss.f |
1:50:00 (One hour and fifty minutes) |
|
number |
3.5h (Three and a half hour) |
|
wallclock |
wallclock(2003-08-01T12:10:30+1.00) |
The value "indefinite" can also be used to define never ending loops.
Duration
The duration (dur="5s") attribute of an element defines how long the element will be visible:
<html> <head> <style>.t {behavior: url(#default#time2)}</style></head> <body> <img class="t" src="image1.jpg" dur="5s" /> </body> </html> |
Click here to try it yourself.
When To Start?
The begin (begin="2s") defines when the element will be visible (start playing):
<html> <head> <style>.t {behavior: url(#default#time2)}</style></head> <body> <img class="t" src="image1.jpg" begin="2s" /> </body> </html> |
The Sequence Element <seq>
· The <seq> element defines a sequence.
· The children elements of the <seq> element are displayed in a sequence, one after each other.
· You can use the <seq> element to define a list of images to be displayed, a list of paragraphs, a list or videos, or any other elements.
· The <seq> element can have a number of attributes. The most common attributes are:
|
Attribute |
Value |
Description |
|
begin |
time |
Sets the delay before the element is displayed |
|
dur |
time |
Sets the duration for the display |
|
repeatCount |
number |
Sets the number of repetitions for the display |
For a full list of SMIL elements and attributes: W3Schools SMIL Reference.
Example: Displaying a Sequence of Images
<html xmlns:t="urn:schemas-microsoft-com:time"> <head> <?import namespace="t" implementation="#default#time2"> <style>.t {behavior: url(#default#time2)}</style></head> <body> <t:seq repeatCount="indefinite"> <img class="t" src="image1.jpg" dur="1s" /> <img class="t" src="image2.jpg" dur="1s" /></t:seq> </body> </html> |
Example: Displaying a Sequence of Texts
<html xmlns:t="urn:schemas-microsoft-com:time"> <head> <?import namespace="t" implementation="#default#time2"> <style>.t {behavior: url(#default#time2)}</style></head> <body> <t:seq repeatCount="indefinite"> <h2 class="t" dur="1s"> I will display for one second</h2> <h2 class="t" dur="2s"> I will display for two seconds</h2> <h2 class="t" dur="3s"> I will display for three seconds</h2></t:seq> </body> </html> |
Click here to try it .
The Parallel Element <par>
The <par> element can have a number of attributes. The most common attributes are:
|
Attribute |
Value |
Description |
|
begin |
time |
Sets the delay before the element is displayed |
|
dur |
time |
Sets the duration for the display |
|
endsync |
"first"|"last"|id(clip) |
Synchronizes the stopping of elements |
|
repeatCount |
number |
Sets the number of repetitions for the display |
For a full list of SMIL elements and attributes: W3Schools SMIL Reference.
Synchronization
· A parallel group of clips can be stopped at the same time using the endsync attribute in the <par> tag.
· endsync="first" stops all the clips in the <par> group when the shortest clip are finished regardles of any time parameters set for the other clips.
· endsync="last" concludes the <par> group when all clips have finished playing. This is the default.
· endsync="id(ID)" concludes the <par> group when the clip with the identified (ID) clip are finished.
· The ID is referring to the value of the clips id attribute.
Example: Displaying Things Simultaneously
<html xmlns:t="urn:schemas-microsoft-com:time"> <head> <?import namespace="t" implementation="#default#time2"> <style>.t {behavior: url(#default#time2)}</style></head> <body> <par> <t:audio src="liar.wav" repeatCount="indefinite" type="wav" /> <t:seq repeatCount="indefinite"> <h2 class="t" dur="1s"> I will display for one second</h2> <h2 class="t" dur="2s"> I will display for two seconds</h2></t:seq> </par> </body> </html> |
Transitions Belongs To SMIL 2.0
· Transitions are new in SMIL 2.0.
· Transitions were not a part of the SMIL 1.0 specification.
· Internet Explorer 6 supports transitions based on the SMIL 2.0 specification.
· Transitions are implemented with the element <transitionfilter>.
Attributes
The <transitionfilter> element can have several attributes. The most common are:
|
Attribute |
Description |
Example |
|
type |
Defines the type of transition filter (see transition
filter list) |
type="clockWipe" |
|
begin |
Defines when the transition should begin |
begin="0s" |
|
mode |
Defines the transition mode |
mode="in" |
|
from |
Defines the starting value of the transition |
from="0.2" |
|
to |
Defines the ending value of the transition |
to="0.8" |
Transition Filters
The following transition filters can be used:
|
fade, barnDoorWipe, barWipe, clockWipe, ellipseWipe,
fanWipe, irisWipe, pushWipe, slideWipe, snakeWipe, spiralWipe, starWipe |
Example: Displaying Transitions
<html xmlns:t="urn:schemas-microsoft-com:time"> <head> <?import namespace="t" implementation="#default#time2"> <style>.t {behavior: url(#default#time2)}</style></head> <body> <t:transitionfilter targetelement="keyb" type="clockWipe" begin="keyb.begin" dur="2s" /> <img id="keyb" class="t" src="pic_keyb.jpg" dur="4s" width="128" height="107" /> </body> </html> |
· In the example above the image will be displayed for 4 seconds.
· The transition filter will use 2 second to "clockWipe" the image into its place.
Click here to try it yourself.
Media Elements
The following media elements can be used to include media objects in a SMIL document:
|
Element |
Description |
Ver |
|
<animation> |
Defines an animation |
1 |
|
<audio> |
Defines an audio clip |
1 |
|
<brush> |
Defines a brush |
1 |
|
<img> |
Defines an image |
1 |
|
<param> |
Defines a parameter |
1 |
|
<ref> |
Defines a generic media reference |
1 |
|
<text> |
Defines a text |
1 |
|
<textstream> |
Defines a texstream |
1 |
|
<video> |
Defines a video |
1 |
Media Attributes
· Each media object in a SMIL document must be included using a reference (URL) in the src attribute.
· The src attribute is the most commonly used attribute for media elements.
· The type attribute is used to define the media type.
· If the type attribute is omitted the application should rely on the type information communicated by the server.
· Developers should not rely on the file type extension to define the file type.
|
Attribute |
Description |
Ver |
|
erase |
Defines the behavior of the element after any timing is
complete |
1 |
|
src |
Defines the source of a media object |
1 |
|
type |
Defines the media type |
1 |
For a full list of SMIL elements and attributes: W3Schools SMIL Reference.
The <animation> Element
· The <animation> element defines a reference to an animation object stored as vector graphics or in another animated format.
· The <animation> element should not be confused with the <animate> element.
· The <animation> element defines an animation object by reference.
· The <animate> elements defines the animation of other elements.
The <audio> Element
The <audio> element defines a reference to an audio object stored as recorded audio.
Example:
<html xmlns:t="urn:schemas-microsoft-com:time"> <head> <?import namespace="t" implementation="#default#time2"></head> <body> <t:audio src="liar.wav" repeatCount="indefinite" type="wav" /> </body> </html> |
Click here to try it yourself.
The <brush> Element
· The <brush> element defines a fill color or fill pattern.
· The element defines painting a color or a pattern in place of a media object.
The <img> Element
· The <img> element defines a reference to an image object stored as JPG or an other image format.
· Example: <img src="myimage.gif" type="GIF" />
The <param> Element
· The <param> element defines a parameter to any other media element.
· Example: <param name="color" value="red" />
The <ref> Element
· The <ref> element defines a reference to a generic media object.
· The <ref> element can be used when the media type is not well defined.
The <text> Element
· The <text> element defines a reference to a text object stored as text.
The <textstream> Element
· The <textstream> element defines a reference to a text object stored as a text-stream.
The <video> Element
· The <video> element defines a reference to a video object stored as recorded video.
Example:
<html xmlns:t="urn:schemas-microsoft-com:time"> <head> <?import namespace="t" implementation="#default#time2"></head> <body> <t:video src="http://www.ananova.com/about/vap_windows_check.wmv" repeatCount="indefinite" type="wmv" /> </body> </html> |
Click here to try it .
SMIL Editor : LimSee2 http://wam.inrialpes.fr/software/limsee2/
- LimSee2 is an authoring application for SMIL
1.0
and 2.0
languages.
- LimSee2 features a powerfull WYSIWYG graphical user interface designed to
ease the manipulation of time-based multimedia scenarios and increase
productivity.
- LimSee2 is a free and open-source
Java
application, with easy-to-use installers for Windows, Linux
and MacOS X
- LimSee2 is a software project conducted by the WAM team
(Web Adaptation Multimedia) at INRIA, Grenoble, France

|
|
MathML
- MathML is an XML application for rendering mathematical
expressions, equations, and notations.
- MathML consists of presentation and content.
·
The advantages of MathML
·
formulas
can be naturally integrated with other web content such as text and
·
images
·
good
visual appearance for viewing and printing
·
faster
download times
·
allows
interactivity
·
allows
mathematical content to be exchanged between different applications
·
The disadvantages of MathML
- specific MathML rules are invisible to generic
XML processors and validators
- not supported by all HTML browsers
- interpretation dependent on browser so individual
browsers may offer different
- renderings
- restricted to high school level mathematics
The <math> element tag
·
The
top-level math element encapsulates the MathML markup within an HTML page.
·
The
<math> and </math> tags distinguish MathML from other
markup languages.
·
All
MathML markup is inserted between two tags:
<math> … </math>
Presentation elements
·
Deal
with the presentation of the mathematics
·
About
30 MathML presentation elements.
o e.g., there is an <mfrac>
element for presenting fractions and an <msqrt> element for
presenting a square root.
·
Presentation
elements represent
templates for presenting the mathematics.
Divided into five groups: tokens,
general layout, scripts and limits, tables, and actions.
- Token elements are used to store character data and are the
only elements that can directly contain character data. All other elements
contain other MathML
- elements as their content.
- General layout elements are used to group
or "fence" expressions as well as to form templates for such
things as fractions and radicals.
- MathML contains seven different presentation
elements for scripts but the most common scripts are superscripts
and subscripts.
- Tables presentation elements are used to
form tables and matrices.
- Actions presentation elements are used to
bind sub-expressions together.
Token elements
Token element tags represent
identifiers, numbers, operators, text, whitespace character, and string
literals.
|
Element tag |
Definition |
|
<mi>
|
identifier
such as a variable,function name or constant |
|
<mn>
|
number |
|
<mo>
|
operator,
fence, or separator |
|
<mtext>
|
text |
|
<mspace/>
|
space |
|
<ms>
|
literal
string |
General layout schemata
elements
General layout schemata allows the arranging
of tokens into expressions.
|
Element tag |
Definition |
|
<mrow>
|
horizontally
group any number of subexpressions |
|
<mfrac>
|
form
a fraction from two subexpressions |
|
<msqrt>
|
form
a square root |
|
<mroot>
|
form
a radical |
|
<mstyle>
|
style
change |
|
<merror>
|
enclose
an error message from a preprocessor |
|
<mpadded>
|
adjust
space around content |
|
<mphantom>
|
make
content invisible but preserve the size |
|
<mfenced>
|
surround
content with a pair of fences |
Scripts and limit schemata
The main function of script and
limit schemata tags are to position one or more scripts around a base.
|
Element tag |
Definition |
|
<msub>
|
attach
a subscript to a base |
|
<msup>
|
attach
a superscript to a base |
|
<msubsup>
|
attaches
a subscript and a superscript to a base |
|
<munder>
|
attach
an underscript under a base |
|
<mover>
|
attach
a overscript over a base |
|
<munderover>
|
attach
an underscript and an overscript to a base |
|
<multiscripts>
|
attach
prescripts and tensor indices to a base |
Tables
Several tags exist in presentation
markup that deal with tables and matrices.
|
Element tag |
Definition |
|
<mtable>
|
table
or matrix |
|
<mtr>
|
row
in a table or matrix |
|
<mtd> |
one entry in a table or matrix |
|
<maligngroup/> |
alignment group marker |
|
<malignmark/> |
alignment point marker |
Actions
MathML only has one presentation
element tag for actions.
|
Element tag |
Definition |
|
<maction>
|
binds
actions to a subexpression |
Content elements
·
Deal
with the meaning behind mathematics.
·
About
120 content elements in MathML.
· Purpose of content elements
o To provide the explicit encoding of
the underlying mathematical structure of an expression.
o To establish explicit connections
between mathematical structures and their mathematical meanings.
o To directly describe mathematical
objects.
o To encode symbolic meaning.
o To capture mathematical structure.
Categories of content
element tags
- About 75 content element tags and about a dozen
attributes.
- Content element tags can be grouped into the
following categories which broadly reflect the area of mathematics from
which they come:
|
Content element categories |
|
token
elements |
|
basic
content elements |
|
arithmetic,
algebra, and logic |
|
relations |
|
calculus |
|
set
theory |
|
sequences
and series |
|
trigonometry |
|
statistics |
|
linear
algebra |
|
semantic
mapping elements |
MathML Example
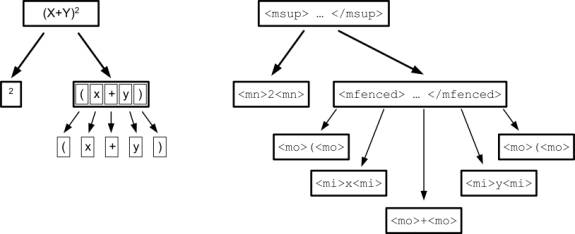
(x+y)2
·
The decomposition process of this mathematical expression breaks into a
(x+y)"base", and a single character 2 as a "script”.
·
The base further breaks into a sequence of two characters (x and y) and
three symbols ( (, + and )).
·
The MathML presentation encoding of this mathematical expression is:
|
<msup> //
Expression with superscript |
·
Common to think abstractive about MathML expressions as tree structures.
·
Each node in the tree is related to a particular layout schema, and its
child nodes correspond to its sub-expressions.
· This abstract expression
tree also describes how the MathML tags should be nested to encode the
expression, and how typesetting "boxes" should be nested on the
screen to display the notation, such as in the figure bellow.
The W3C MathML software list http://www.w3.org/Math/Software/
Example
|
<?xml
version="1.0" encoding="UTF-8"
standalone="no"?> |
|
<?xml-stylesheet
type="text/xsl" href="mathml.xsl"?> |
|
<html xmlns="http://www.w3.org/1999/xhtml" xml:lang="en"> |
|
|
|
<math xmlns="http://www.w3.org/1998/Math/MathML"> |
|
<apply> |
|
<int/> |
|
<bvar> |
|
<ci> x </ci> |
|
</bvar> |
|
<lowlimit> |
|
<cn> 0 </cn> |
|
</lowlimit> |
|
<uplimit> |
|
<ci> a </ci> |
|
</uplimit> |
|
<apply> |
|
<plus/> |
|
<ci> a </ci> |
|
<ci> x </ci> |
|
</apply> |
|
</apply> |
|
</math> |
|
|
|
</html> |
Required Style Sheets:
mathml.xsl, pmathml.xsl, ctop.xsl and pmathmlcss.xsl.
Result int2.xml
Complex File complex1.xml
|
|
DocBook - http://docbook.org/
Reference: Single-Source
Publishing with DocBook XML (Dan York)
http://www.lodestar2.com/people/dyork/talks/2002/ols/docbook-tutorial/frames/frames.html
What is DocBook?
· A system for writing structured documents using SGML or XML
· Targeted at documents about computer technology, but can be used for other subjects
· Also other uses such as web sites and slides (like these!)
· Supported by a growing number of commercial and free software/open source tools
· Supported by a large community of DocBook users and developers
Example - Book
<?xml version="1.0"?> |
<!DOCTYPE book PUBLIC "-//OASIS//DTD DocBook XML V4.1.2//EN" |
"http://www.oasis-open.org/docbook/xml/4.1.2/docbookx.dtd"> |
<book> |
<bookinfo> |
<title>Sample Book</title> |
</bookinfo> |
<chapter> |
<title>First Chapter</title> |
<sect1> |
<title>First Section</title> |
<para>This is a paragraph.</para> |
</sect1> |
<sect1>...</sect1> |
</chapter> |
<chapter>...</chapter> |
<chapter>...</chapter> |
<chapter>...</chapter> |
<appendix>...</appendix> |
<appendix>...</appendix></book> |
What
do you need?
· An editor
· The DocBook XML DTD (optional)
· The DocBook XSLT stylesheets
· An XSLT processor
Installing
the DocBook DTD
Download the XML v4.1.2 DTD from: http://www.oasis-open.org/docbook/xml/index.shtml
DocBook
XSL stylesheets
· "Standard" set of "modular" stylesheets maintained primarily by Norman Walsh.
· Two sets of stylesheets:
o XSL
o DSSSL
· Available from http://docbook.sourceforge.net/
Specifically http://sourceforge.net/project/showfiles.php?group_id=21935
XSL
Stylesheets
· XSLT stylesheets can transform DocBook XML into the following formats:
o HTML
o HTML Help (for Windows Help)
o Java Help
o XHTML
o XSL Formatting Objects (FO)
· Other tools can take FO into PDF, PostScript, etc.
Starting
a document
· Always starts with header:
<?xml version="1.0"?>
<!DOCTYPE article PUBLIC "-//OASIS//DTD DocBook XML V4.1.2//EN"
"http://www.oasis-open.org/docbook/xml/4.1.2/docbookx.dtd">
May have to change URL to local path if offline
· Will usually be a <book> or <article> (need to change header line appropriately)
· If <book>, will be composed of multiple <chapter> elements each with sections inside
· If <article>, will be composed of multiple section elements
· Indenting and all whitespace is ignored except in some verbatim elements
Sections
· DocBook contains sections that can be nested.
· Either of two styles, specific (<sect1-5>):
<sect1> |
<sect2> |
<sect3>...</sect3> |
<sect3> |
<sect4> |
<sect5>...</sect5> |
<sect5>...</sect5> |
</sect4> |
<sect4>...</sect4> |
</sect3> |
</sect2> |
<sect2>...</sect2> |
</sect1> |
<sect1>...</sect1> |
<sect1>...</sect1> |
Creating
a first document
<?xml version="1.0"?> |
<!DOCTYPE article PUBLIC "-//OASIS//DTD DocBook XML V4.1.2//EN" |
"http://www.oasis-open.org/docbook/xml/4.1.2/docbookx.dtd"> |
<article> |
<articleinfo> |
<title>Sample Article</title> |
</articleinfo> |
<para>This is an introductory paragraph.</para> |
<sect1> |
<title>Introduction</title> |
<para>This is a paragraph.</para> |
<sect2> |
<title>Purpose</title> |
<para>Blah, blah, blah... </para> |
</sect2> |
<sect2> |
<title>Scope</title> |
<para>This is more text</para></sect2> |
</sect1> |
<sect1> |
<title>Installation</title> |
<para>To install this program, you need to execute some script. |
</para> |
</sect1> |
</article> |
|
|
Transforming XML into HTML and PDF – Docbook example
Tools – xslt engines
Libxml http://www.zlatkovic.com/libxml.en.html#binaries
SAXON http://saxon.sourceforge.net/saxon6.5.3/
FOP (http://xml.apache.org/fop/)
free/open-source
FO engine available from the Apache XML Project
Using xsltproc to generate HTML output
xsltproc docbook/html/docbook.xsl filename.xml > output.html
Sample
Output
Sample HTML Output ( xml
file html file)
|
|
|
|
Table
of Contents |
|
|
|
This
is an introductory paragraph. |
Introduction
|
|
|
|
This is a paragraph. |
Purpose
|
|
|
|
Blah, blah, blah... |
Scope
|
|
|
|
This is more text |
Installation
|
|
|
|
To install this program, you need to
execute some script. |
Using xsltproc and FOP to generate PDF output
1. xsltprocdocbook/fo /docbook.xslfilename.xml>output.fo
2. fop output.fo
output.pdf
Sample Output:
1. XML file
2. fo file
3. PDF file