- What is VMware View
- Connecting from Off-Campus
- Connecting to View Desktops
- Extra View Tips
- What to do if something is wrong
What is VMware View
VMware View is a technology that allows us to present a remote desktop, with all of the software needed for your course, to students and faculty at any time of the day, from any location — on or off campus.
IMPORTANT: Connecting from Off-Campus
Users who are located off-campus must first get on the internal Pace network. The easiest way to accomplish this is to use the Pace VPN, located at https://vpn.pace.edu. For a tutorial on connecting to the VPN, please see ITS’s VPN documentation: http://www.pace.edu/information-technology-services/services/virtual-private-network
Connecting to View Desktops
To connect to a View Desktop, you will need to download the VMware View Client. The client is availible for PC, Mac and Linux users. Note that VMware View also goes by the name VMware Horizon View and also VMware Horizon.
Downloading the Client
The latest clients are available at VMware’s Site.
Windows users will want to download the “VMware Horizon Client” in either the 32 or 64 bit version (whichever matches your operating system).
Mac users can just choose the default option.
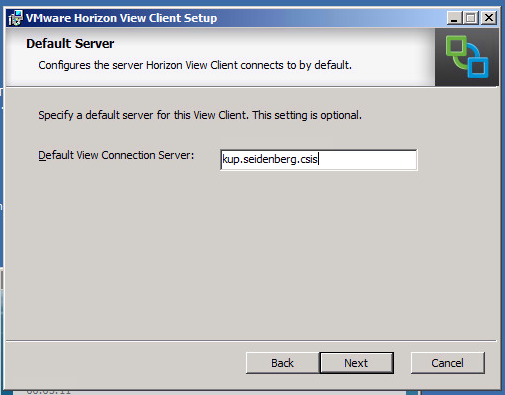
Windows Installation
Once the installer is downloaded to your computer, you can click on it to being the install process.
While installing the client, you can choose a default connection server, entering kup.seidenberg.csis here will save you a future step.
Mac Installation
Download the View Client, open the downloaded disk image and drag it on the Applications folder. From this point on, the Mac View client resembles the Windows client, apart from the buttons.
Connecting
Note, these instructions were made with the VMware Horizon View Client 2.0 and may not reflect the latest version of the client.
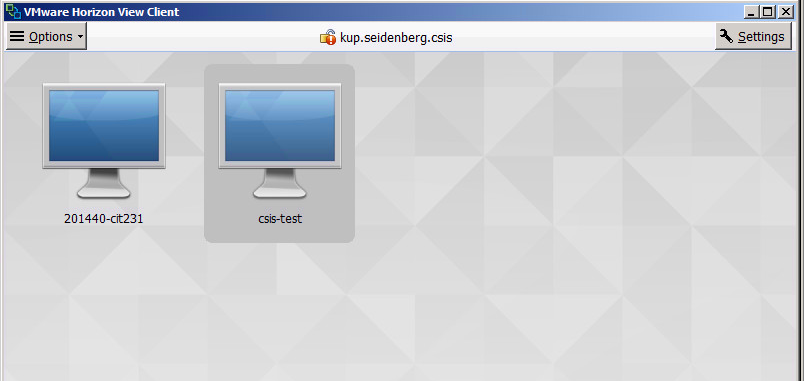
Once the view client is installed, you should have a VMware View Client icon on your desktop and in your Start Menu. Click on it. If you added kup.seidenberg.csis as the default connection server, you will see a cloud icon with the address.
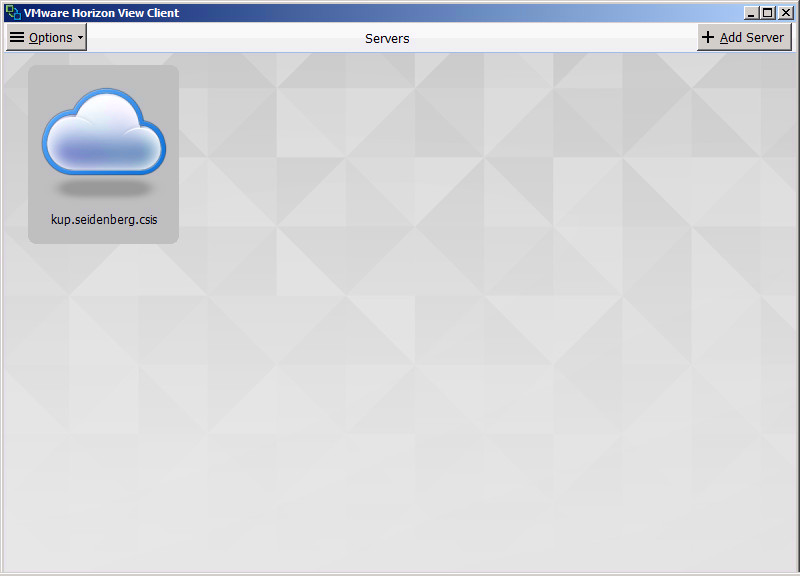
If you do not see that, you will have to click the ”+ Add Server” button on the top right of the window and add kup.seidenberg.csis.
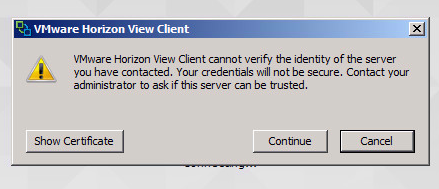
Clicking on the cloud icon will bring up a warning about a certificate. This is normal. The connection uses a self-signed certificate, you can safely click continue. Once you do, you will be asked to enter your username and password.
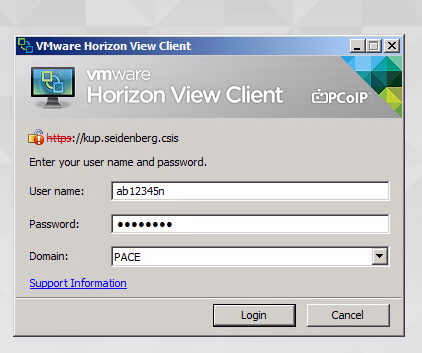
Once you have entered your username and password, click Login. You should be presented with the available View Desktops that have been assigned to your account.
Clicking on one will bring up a full-screen window with your remote View desktop in it. Sometimes the window will be black for a minute or two while the desktop is being started up. Eventually, you will see the blue Windows logon window.
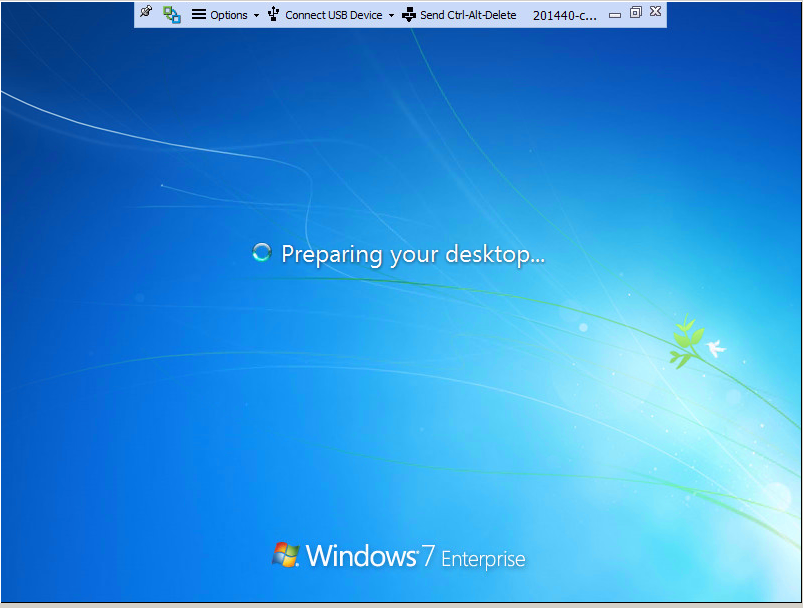
If this is your first time connecting, the “Preparing your desktop” message will take an extra minute to go away.
Finally, you will be presented with your desktop. Check to make sure that your required programs are installed (they’re most likely in the Start Menu at the bottom left corner).

Extra View Tips
The View client resembles the Microsoft Remote Desktop client in that it has a toolbar on the top. By default, the toolbar is pinned. If you need to access menus or buttons below the toolbar, you can click the thumbtack on the left. The View toolbar will disappear back into the top of the screen. If you would like it back, move your mouse to the top of the screen — the toolbar will come down again (you can pin it again with the thumbtack).
You can also minimize the View client by using the _ button on the right side of the toolbar. This allows you to do other work in the background.
When you are finished with the view client, you can either log off the desktop with the traditional Windows logoff button (click the start menu, it should be on the right of the start menu pane) — or you can click the X on the View toolbar.
What to do if something is wrong
Come back later.
Last edited, February 11, 2015 by treivik, pc=1.2.0-dev